Few desserts capture the spirit of summer quite like a Pineapple Cream Cheese Pie. It’s luscious, light, and packed with a tropical flavor that’s both refreshing and indulgent. This no-bake dessert combines the rich creaminess of whipped cream and cream cheese with the juicy brightness of crushed pineapple, all resting on a buttery graham cracker crust that offers the perfect crunch.
Whether you’re an experienced baker or a complete kitchen novice, this pie is practically foolproof. No oven? No problem. All it takes is a few simple ingredients, a little bit of mixing, and some refrigerator time to transform everyday pantry items into an irresistible dessert that’s bound to impress.
In this comprehensive guide, you’ll discover:
- Step-by-step instructions
- Ingredient breakdowns and substitutions
- Expert tips for a flawless finish
- Storage and freezing advice
- Variations and customization ideas
- Answers to frequently asked questions
- Serving suggestions and topping inspiration
Let’s take a deeper dive into this showstopping no-bake Pineapple Cream Cheese Pie.
Why You’ll Love This Pineapple Cream Cheese Pie
There’s something universally appealing about no-bake desserts. They’re convenient, require minimal equipment, and don’t demand standing over a hot oven. But this pie takes no-bake to a whole new level.
Here’s why it’s a crowd favorite:
- Effortless to make: No complicated techniques or equipment needed.
- Versatile: Perfect for potlucks, picnics, birthdays, barbecues, or weeknight cravings.
- Cool and refreshing: Ideal for warmer months, yet satisfying all year round.
- Customizable: Add different fruits, toppings, or swap the crust.
- Make-ahead friendly: Prepare the night before for a stress-free dessert.
This dessert tastes like a tropical vacation in every bite. Let’s start with the most important foundation of the pie—the crust.
Step 1: The Perfect Graham Cracker Crust
The graham cracker crust is the unsung hero of this dessert. It balances the creamy filling with a buttery, crumbly base that’s satisfying and stable. And best of all, it requires no baking!
🧾 Ingredients for the Crust:
- 1½ cups graham cracker crumbs
- ¼ cup granulated sugar
- ½ cup unsalted butter, melted
🥣 Instructions:
- Combine Ingredients:
In a medium mixing bowl, blend the graham cracker crumbs and sugar. Pour in the melted butter and stir until all the crumbs are evenly coated and the mixture resembles wet sand. - Press into Pan:
Transfer the mixture into a 9-inch pie pan. Use a flat-bottomed glass, spoon, or measuring cup to press the crumbs firmly and evenly into the bottom and up the sides of the pan. - Chill the Crust:
Place the crust in the refrigerator for at least 30 minutes. This firms it up and prepares it to hold the creamy filling.
🟡 Pro Tip: For a firmer crust with extra flavor, you can bake it at 350°F (175°C) for 8–10 minutes. Let it cool completely before adding the filling.
Step 2: Creamy Pineapple Filling
This is the soul of the pie. The pineapple cream cheese filling is a smooth, velvety blend of tangy cream cheese, fluffy whipped cream, and sweet crushed pineapple. It’s cloud-like in texture and tropical in taste.
🧾 Ingredients for the Filling:
- 8 oz cream cheese, softened
- ½ cup granulated sugar
- 1 tsp vanilla extract
- 1 can (20 oz) crushed pineapple, well-drained
- 1 cup heavy whipping cream
🥣 Instructions:
- Beat Cream Cheese and Sugar:
In a large mixing bowl, beat the softened cream cheese with the sugar using a hand or stand mixer until the mixture is smooth and creamy. This typically takes 2–3 minutes. - Add Vanilla Extract:
Mix in the vanilla for added depth of flavor. - Fold in Crushed Pineapple:
Ensure the pineapple is thoroughly drained to prevent a watery filling. Gently fold it into the cream cheese mixture. - Whip the Cream:
In a separate bowl, whip the heavy cream until stiff peaks form. - Combine:
Gently fold the whipped cream into the pineapple mixture. Be careful not to overmix, as you want to keep the airy texture.
🟢 Expert Tip: The whipped cream gives the filling its cloud-like lightness. Make sure it’s whipped to stiff peaks before folding for best results.
Step 3: Assemble and Chill the Pie
Now that you’ve prepared the crust and filling, it’s time to bring them together.
🥄 Instructions:
- Add Filling to Crust:
Spoon the creamy pineapple mixture into the prepared crust. Use a spatula to smooth the top. - Refrigerate:
Cover the pie with plastic wrap and refrigerate for at least 4 hours—overnight is even better. This allows the pie to firm up and the flavors to meld.
🧊 Why Chilling Is Essential: The chill time is what transforms the soft filling into sliceable perfection. If sliced too early, it may fall apart.
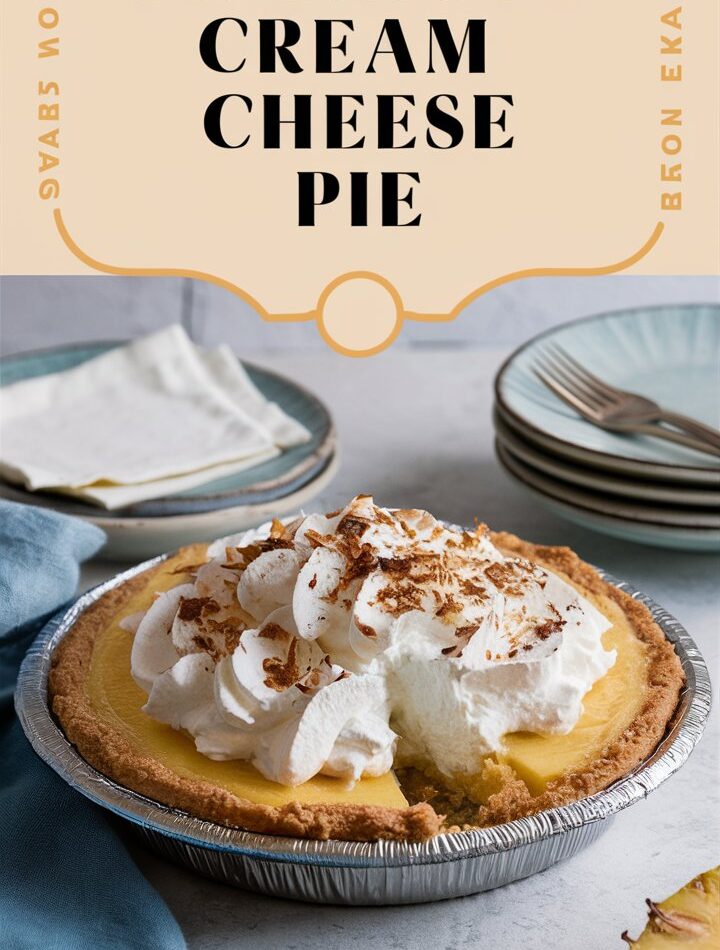
Step 4: Garnish and Serve
This pie is beautiful as-is, but garnishing it makes it even more festive and flavor-packed.
🍒 Optional Toppings:
- Dollops or piping of whipped cream
- Toasted coconut flakes for crunch and a tropical vibe
- Maraschino cherries or pineapple rings for flair
- White chocolate curls for decadence
🍽 Serving Suggestions:
- Slice with a warm, dry knife for clean cuts.
- Serve chilled straight from the refrigerator.
- Pair with iced tea, lemonade, or a tropical cocktail.
Pineapple Cream Cheese Pie Variations
While this classic recipe is amazing, variety is the spice of life. Here are creative spins to try:
🥥 Coconut Pineapple Cream Cheese Pie
Add ½ cup shredded sweetened coconut to the filling or sprinkle on top for an extra island-inspired flavor.
🍪 Oreo Crust Twist
Swap the graham crackers for crushed vanilla Oreos or Golden Oreos to make a sweeter, cookie-like crust.
🥭 Mango Pineapple Pie
Substitute half the crushed pineapple with mashed mango for a delicious tropical fusion.
🍋 Citrus Zest Burst
Add lemon or lime zest to the filling for a bright citrus kick that balances the sweetness.
🧁 Mini Pie Cups
Prepare in cupcake liners for individual servings—a great option for parties and potlucks.
Make-Ahead and Storage Tips
Planning ahead? No problem! This pie is ideal for make-ahead preparation.
🕒 How Long Does It Last?
- Refrigerator: Up to 4 days (covered with plastic wrap or in an airtight container)
- Freezer: Wrap tightly and freeze for up to 2 months. Thaw overnight in the fridge before serving.
❄️ Freezing Tip: Freeze without toppings. Add garnishes after thawing for best texture and presentation.
Frequently Asked Questions (FAQs)
1. Can I use fresh pineapple?
Yes! Finely crush it and drain thoroughly to prevent a watery filling.
2. Why is my filling too soft?
Most likely causes:
- Pineapple wasn’t drained enough
- Whipped cream wasn’t stiff
- Not chilled long enough
3. Can I use Cool Whip instead of whipped cream?
Yes, you can substitute with 2 cups of Cool Whip. The texture will be slightly denser but still delicious.
4. Is this pie gluten-free?
The filling is naturally gluten-free. Use gluten-free graham crackers for the crust.
5. Can I make this pie dairy-free?
Try dairy-free cream cheese and coconut whipped cream, but note the texture will vary slightly.
Nutritional Overview (Per Slice, Estimated)
- Calories: 340–380 kcal
- Fat: 24g
- Carbohydrates: 30g
- Sugar: 20g
- Protein: 4g
📌 Values are approximate and can vary based on ingredient brands and portion sizes.
Behind the Pie: A Little History & Inspiration
Cream cheese pies have been an American dessert staple since the mid-20th century, popularized during the rise of quick, no-bake cooking methods in the 1950s and 60s. Canned fruits like pineapple became kitchen heroes, and home cooks embraced chilled pies for their ease, elegance, and versatility.
This pineapple version pays tribute to the tropical desserts found in Hawaiian and Caribbean cuisine while keeping the preparation simple and fuss-free for modern households. It’s a nod to the past with a fresh, creamy twist.
Final Thoughts: Why This Pie Deserves a Spot in Your Recipe Box
The Pineapple Cream Cheese Pie is more than just a recipe—it’s a crowd-pleasing masterpiece you’ll return to time and again. Whether you’re hosting a summer soirée, bringing dessert to a holiday party, or simply craving something sweet, this no-bake tropical pie hits all the right notes.
- It’s easy.
- It’s elegant.
- It’s irresistibly delicious.
This is the kind of dessert that earns rave reviews and recipe requests wherever it goes.